
Soups & Stews
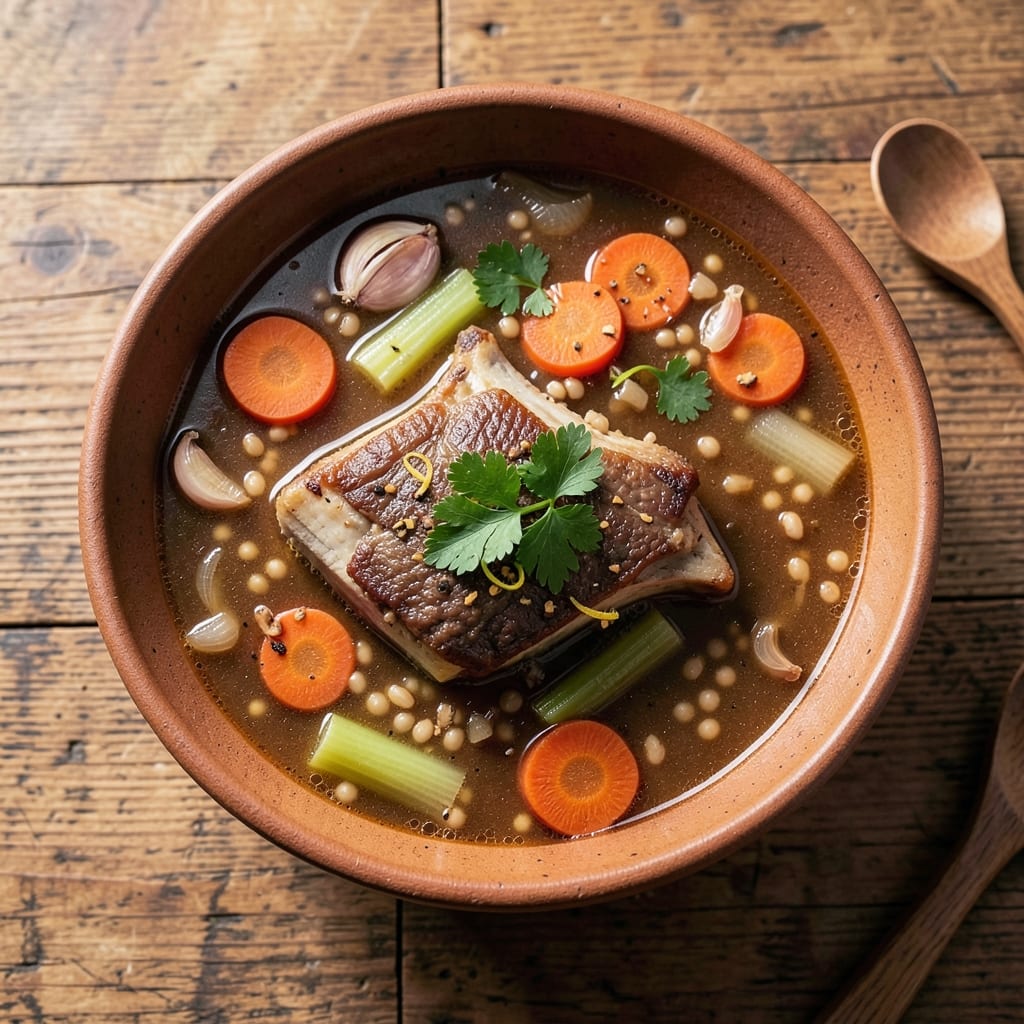
This beef bone and barley soup recipe transforms tough beef bones into a deeply flavorful broth that warms both body and soul. 🌟 The secret lies in slow-simmering—extracting maximum umami from bones and barley for a soup that tastes even better the next day. I've perfected this method after years of testing, ensuring every spoonful delivers rich, comforting depth without bitterness.
The process begins with roasting beef bones to deepen their flavor before simmering them for hours with aromatic vegetables and herbs. Barley adds hearty texture and natural thickening, while a splash of vinegar brightens the broth. This isn't just soup—it's a nourishing elixir that builds flavor as it cooks, rewarding patience with restaurant-quality results at home.
What makes this recipe special is its versatility—adapt it to Korean galbi tang or Chinese bone soup traditions by adjusting spices, or keep it classic with Western barley flavors. The result is a soup so satisfying it becomes the centerpiece of any meal, with each bowl offering layers of savory, herbal, and slightly sweet notes that linger.
Perfect for cold evenings or meal prep, this soup freezes beautifully and tastes even more robust after reheating. Let's create something truly comforting that will become a staple in your kitchen.
Ingredients for beef bone barley soup
Six aromatic vegetables, slow-roasted bones, and barley's earthy depth create this deeply satisfying umami-rich soup.
| Ingredient | Amount | Notes |
|---|---|---|
| Beef Bones 🦴 | 3 lb | Marrow-rich, cut into chunks |
| Pearl Barley 🌾 | 1 cup | Uncooked, rinsed thoroughly |
| Yellow Onion 🧅 | 1 whole | Chopped, medium size |
| Carrots 🥕 | 4 medium | Peeled, cut into chunks |
| Garlic Cloves 🧄 | 6 cloves | Peeled, smashed lightly |
| Celery Stalks 🌿 | 4 whole | Cut into 1-inch pieces |
| Fresh Thyme 🌿 | 2 sprigs | Or 1 tsp dried thyme |
| Fresh Parsley 🌿 | ¼ cup | Chopped, for garnish |
| Apple Cider Vinegar 🍎 | 2 tbsp | For brightness |
| Bay Leaves 🍃 | 2 whole | Dried, removed before serving |
| Black Peppercorns 🌶️ | 1 tsp | Crushed, whole preferred |
| Salt 🧂 | 2 tsp | Diamond Crystal preferred |
| Vegetable Oil 🫒 | 2 tbsp | For roasting bones |
The bones are non-negotiable—marrow-rich knuckle bones from Whole Foods or your local butcher deliver the most flavor. Look for bones with visible marrow and minimal meat clinging. Costco often has excellent bulk options, but if you're buying just for one batch, check the meat counter for beef soup bones. Roast them at 450°F for 30 minutes before simmering to deepen their umami. The barley should be pearled (not pearlized)—it cooks faster and maintains texture. Rinse it thoroughly before adding to remove any bitterness.
No fresh thyme? Dried works at one-third the amount, but the flavor profile shifts slightly. Substituting carrots for parsnips adds natural sweetness without altering texture. The vinegar is crucial—apple cider or white wine vinegar brightens the broth, while balsamic adds depth but may darken the color. For a Korean-inspired twist, swap barley for short-grain rice or tapioca pearls. The celery can be subbed with fennel for an anise note, though it will change the soup's character entirely. Always use crushed black peppercorns rather than pre-ground for maximum aroma.
This soup improves with time—4-5 days in the fridge, 6 months frozen. Portion into containers before freezing for easy reheating. For meal prep, make a double batch and freeze half immediately. The bones can be roasted ahead and stored in the freezer for 3 months. Garnish with fresh parsley just before serving—it adds vibrant color and a fresh herbal note that contrasts beautifully with the rich broth. Leftovers reheat perfectly, with flavors deepening further upon warming.
Why You'll Love This Recipe
- One-Pot Wonder: I swear by this recipe because it’s actually hands-off after the initial simmer. Toss in the bones, barley, and veggies—then walk away. The barley softens while the bones melt into rich broth, and honestly? That’s my kind of magic.
- Umami Bomb: The beef bones alone make this soup sing, but add the caramelized onions and garlic? It’s like a flavor explosion. The barley soaks up all that deep, savory goodness—crispy edges, tender meat, and a broth so rich you’ll want to lap it up.
- Lunchbox Hero: Between us, this soup is my secret weapon for meal prep. The barley holds up for days, and the flavors only get better as it sits. Pack a thermos, and you’ve got a hearty, filling lunch that’ll keep you going—no sad desk salads here.
- Budget Magic: Beef bones might sound fancy, but they’re the ultimate stretch. A single batch feeds four (or one very hungry person twice), and the barley turns cheap ingredients into something restaurant-worthy. Plus, leftovers taste even better the next day—win-win.
Step-by-step instructions for beef bone and barley soup
Transform simple ingredients into a deeply flavorful soup through precise technique and patience.
🔥 Step 1: Roast the Beef Bones for Maximum Flavor
Preheat your oven to 425°F and position a rack in the middle position. Place the 3 lb beef bones on a baking sheet lined with parchment paper. Drizzle evenly with the 2 tbsp vegetable oil and rub to coat completely, ensuring every bone is well-oiled for even browning.
Roast for 30-40 minutes until the bones develop a deep mahogany color and the marrow begins to soften slightly. Flip them halfway through for even browning. This roasting step extracts rich, caramelized flavors that form the foundation of your soup. The bones should smell intensely savory when done—this is your cue they're ready for the pot.
👨🍳 Step 2: Sauté Aromatics Until Deeply Fragrant
While the bones roast, prepare your vegetables. In a large Dutch oven, combine the 1 whole chopped yellow onion, 4 medium carrots cut into chunks, 4 whole celery stalks cut into 1-inch pieces, and 6 smashed garlic cloves. Add the roasted bones to the pot along with the 2 sprigs fresh thyme, 2 whole bay leaves, 1 tsp crushed black peppercorns, and 2 tsp salt.
Pour in 8 cups cold water and bring to a boil over high heat. Once boiling vigorously, reduce heat to medium-low and skim off any foam that rises to the surface. This initial boil helps remove impurities and begins extracting flavors from the bones. The soup should smell like a symphony of savory, earthy aromas—this is where the magic begins.
⏰ Step 3: Simmer the Bones for Deep Umami Extraction
Return the heat to medium-low and maintain a gentle simmer for 2-3 hours. The soup should bubble softly with occasional small bubbles breaking the surface—never a rolling boil. This slow cooking is crucial as it allows the collagen in the bones to break down into gelatin, creating a rich, velvety texture.
After 2 hours, remove the bones and set them aside to cool slightly. Strain the broth through a fine-mesh sieve into a clean pot, pressing gently on the solids to extract every last drop of flavor. Discard the solids. This strained broth is now a concentrated flavor base—save the bones for another use if desired, like making bone broth.
🥘 Step 4: Cook the Barley and Finish the Soup
Return the strained broth to the pot and bring it back to a gentle simmer over medium heat. Add the 1 cup rinsed pearl barley and stir gently to distribute evenly. The barley should be fully submerged—add a splash of water if needed. Simmer uncovered for 45-50 minutes until the barley is tender but still has a slight bite, and the soup has thickened slightly.
In the final 5 minutes of cooking, stir in the 2 tbsp apple cider vinegar. This brightens the soup and cuts through the richness of the bones and barley. Taste and adjust seasoning with additional salt if needed. The soup should be deeply flavorful with a perfect balance of savory, earthy, and slightly tangy notes.
🍽️ Step 5: Serve with Fresh Herbs and Crispy Garnish
Ladle the hot soup into bowls, dividing the 0.25 cup chopped fresh parsley evenly among them. The parsley adds a fresh contrast to the rich broth and barley. For an extra touch, sprinkle each serving with a pinch of freshly cracked black pepper and a drizzle of the reserved marrow from the bones if you chose to save it.
Serve immediately while hot, as the flavors continue to develop and meld. Each spoonful should deliver a perfect balance of hearty barley, velvety broth infused with bone marrow richness, and bright herbal notes. This soup improves with time, so it's perfect for meal prep—just reheat gently on the stove before serving.
Pro Tips For Making Beef Bone Barley Soup
- Char Bones First: Skip the slow simmer start—sear your beef bones in a dry pot over medium-high heat until they turn deep brown. This isn’t just for flavor; it’s the only way to unlock the collagen and turn your broth from murky to rich. (Yes, it’ll smell like a butcher shop, but that’s the point.)
- Rinse the Barley: Pearl barley’s starchy coating makes it gummy if you don’t wash it first. Toss a handful in a fine-mesh strainer and rinse under cold water until the water runs clear. I learned this the hard way—my first attempt turned the soup into a gluey mess.
- Don’t Crowd the Pot: If you dump all your bones, onions, and carrots in at once, the broth will simmer unevenly and the veggies will turn to mush. Start with half the bones, let them sizzle, then add the rest in batches. Your soup will thank you with even cooking and deeper flavor.
- Crush Garlic After Cooking: Toss whole garlic cloves into the pot with the bones—they’ll mellow out and infuse flavor without bitterness. But if you want that fresh, bright punch at the end, crush or mince a few cloves and stir them in just before serving. (I know, I know—it’s two steps, but it makes a real difference.)
Pro cooking tips for beef bone barley soup
Roasting Bones Right
Roasting beef bones at 425°F for 30-40 minutes creates deep caramelization that forms the flavor foundation. I use a Vitamix baking sheet for even heat distribution and flip bones halfway to ensure consistent browning. The key is patience—don't rush this step, as the bones should develop a rich mahogany color. 🔥
Skimming for Clarity
After adding water and bringing to a boil, skim off any foam that rises to the surface using a fine-mesh skimmer. This removes impurities that can cloud your broth. I find that skimming for 5-10 minutes makes a noticeable difference in broth clarity. The foam should be white and frothy—don't confuse it with the golden broth you want to keep!
Simmer Control Matters
Maintain a gentle simmer with occasional small bubbles breaking the surface—never a rolling boil. I use a Thermoworks Sous Vide Thermometer to monitor temperature, keeping it between 185-195°F. This slow extraction transforms collagen into gelatin, creating that luxurious mouthfeel. The longer you simmer (up to 3 hours), the richer the broth becomes.
Barley Timing Tips
Pearl barley should cook for 45-50 minutes until tender but still slightly firm. I test doneness by tasting a grain—it should be soft but not mushy. For extra flavor, toast the barley in the pot for 2 minutes before adding liquid. This adds a nutty depth that complements the bone broth beautifully. 🌾
Vinegar Brightness
Adding 2 tbsp apple cider vinegar in the final 5 minutes cuts through the richness and adds brightness. I like to use Bragg Organic Vinegar for its clean flavor. If you prefer a sweeter note, try white wine vinegar instead. This step is non-negotiable for balancing the soup's depth.
Straining Secrets
Use a fine-mesh sieve or cheesecloth to strain the broth for maximum clarity. I press the solids gently with a wooden spoon to extract every last drop of flavor. For extra smoothness, strain through a nut milk bag if you have one. The result is a velvety broth that's perfect for sipping or serving over barley. ⚡
Nutrition facts
Frequently asked questions
Can I substitute pearl barley for another grain?
Yes! Pearl barley can be swapped for wheat berries (simmer 1 hour longer) or quinoa (cook for 15 minutes instead). For a Korean-inspired version, try short-grain rice (cook 20-25 minutes). Just adjust cooking times—test doneness by tasting.
How do I prevent the soup from being too bitter?
Bitterness comes from overcooked bones or impurities. Always skim foam during the initial boil and use 8 cups fresh cold water (not tap water with chlorine). For extra brightness, add 2 tbsp vinegar in the last 5 minutes. Roast bones properly at 425°F for 30-40 minutes—never burn them.
Can I make this soup in an Instant Pot?
Roast bones first, then add everything to the Instant Pot with 8 cups water. Cook on High Pressure for 90 minutes (natural release), then strain and finish with barley and vinegar. The pressure cooker speeds up collagen extraction—just monitor closely to avoid overcooking.
What’s the best way to store leftovers?
Cool the soup to room temperature within 2 hours, then refrigerate in airtight containers for 4-5 days. For freezing, portion into containers and store for up to 6 months. Reheat gently on the stove—never microwave—to preserve texture. The flavors actually deepen overnight!
Why does my broth look cloudy?
Cloudiness usually means impurities weren’t skimmed properly or bones weren’t roasted enough. For crystal-clear broth, strain through a nut milk bag or cheesecloth after simmering. If it’s still cloudy, simmer uncovered for 10 extra minutes—this helps clarify naturally.