
Soups & Stews
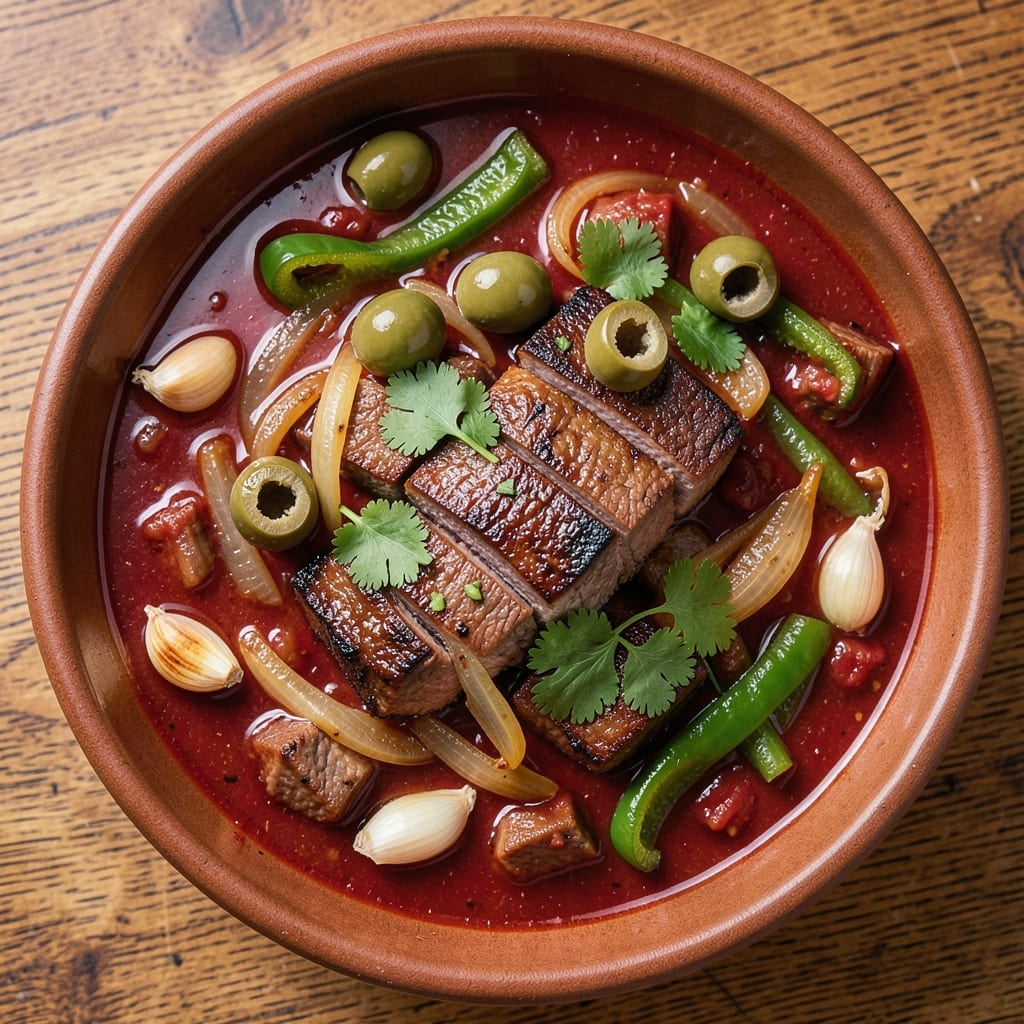
This beef picadillo soup recipe transforms tough cuts of beef into melt-in-your-mouth tenderness while capturing the rich, aromatic essence of Latin American cooking. The secret lies in slow simmering with tomatoes, sofrito, and a blend of warm spices that develop deep, complex flavors over time. I’ve perfected this version to deliver restaurant-quality results at home, where every spoonful is packed with layers of savory, tangy, and slightly sweet notes.
The foundation of great picadillo soup begins with properly browning the beef—this step creates a rich, caramelized crust that forms the base of the stew’s flavor. Adding sofrito (a blend of onions, peppers, and garlic) and a mix of olives, capers, and tomatoes introduces that signature briny, umami depth. The dish finishes with tender rice cooked directly in the broth, ensuring each bite is hearty and satisfying.
What you’ll end up with is a steaming bowl of tender beef, fluffy rice, and a sauce so flavorful it tastes like it’s been simmering for hours. The aroma alone—spiced with bay leaf, cumin, and cilantro—will have everyone gathered around the table. This soup is hearty enough to stand alone but pairs beautifully with warm tortillas or crusty bread for soaking up every last drop.
Perfect for cozy family dinners or potlucks, this recipe scales easily to feed a crowd while keeping the same depth of flavor. The long simmering process means the flavors only get better with time, making it ideal for meal prep. Let’s get started on a bowl of comfort that’s as nourishing as it is delicious.
Ingredients for beef picadillo soup
Sixteen ingredients for a soup that tastes like it simmered all day.
| Ingredient | Amount | Notes |
|---|---|---|
| Beef Chuck Roast 🥩 | 2 lb | Cut into 1-inch cubes |
| Yellow Onions 🧅 | 2 whole | Medium, sliced into strips |
| Green Bell Peppers 🌶️ | 2 whole | Stripped of seeds and sliced |
| Garlic Cloves 🧄 | 6 cloves | Minced, about 1 tbsp |
| Canned Tomato Sauce 🍅 | 2 cups | San Marzano preferred |
| Green Olives 🫒 | ½ cup | Pitted, sliced |
| Capers 🌿 | 2 tbsp | Rinsed if briny |
| Bay Leaves 🍃 | 2 whole | Dried, standard size |
| Ground Cumin 🌶️ | 1 tbsp | Freshly toasted preferred |
| Ground Coriander 🌿 | 1 tbsp | Freshly ground preferred |
| Salt 🧂 | 1 ½ tsp | Diamond Crystal preferred |
| Black Peppercorns 🌶️ | ½ tsp | Freshly cracked |
| Long-Grain White Rice 🍚 | 1 cup | Uncooked, jasmine preferred |
| Chicken Broth 💧 | 4 cups | Low-sodium preferred |
| Fresh Cilantro 🌿 | ¼ cup | Chopped, for garnish |
The beef is non-negotiable—chuck roast is your best bet for that melt-in-your-mouth texture. Costco or local butchers usually have it pre-cut, but if you're buying a whole roast, ask for the chuck section. Look for good marbling—those little fat streaks are what turn tough meat into tender bites. I always grab extra because it freezes beautifully. The bell peppers? Green or red, but green adds that classic picadillo brightness. If you can't find fresh cilantro, dried works at half the amount, but fresh is worth the extra minute to chop.
No chicken broth? Beef broth works too, just skip the bay leaves if you're avoiding meat flavors. The San Marzano tomato sauce is a game-changer—Trader Joe's or Italian markets carry it, and it's worth the splurge. Capers can be pricey, but a small jar lasts forever once opened. If you're short on time, jarred sofrito (the kind with onions, peppers, and garlic) saves 20 minutes of chopping—just use half a cup. The rice? Jasmine or basmati absorbs the broth beautifully, but long-grain white works fine too. Just don't skip the soaking step—it makes all the difference.
This soup only gets better with time—3-4 days in the fridge, the flavors meld into something magical. Freeze portions for up to 3 months, but thaw slowly in the fridge. I always make a double batch because it disappears fast. Store the cilantro separately until serving—it wilts in the hot broth. The rice? Cook it right in the pot so every bite is perfectly tender. Leftovers reheat beautifully—just add a splash of broth if it's too thick. Perfect for meal prep or feeding a crowd!
Why You'll Love This Recipe
- Same recipe, endless uses: dump it over rice for a hearty bowl, serve it in bread bowls for guests, or freeze half for when you’re too tired to cook. I’ll be real—my college dorm mates still ask for this, and now my in-laws too.
- One-Pot Magic: That beef chuck roast practically cooks itself—just brown it, dump in the onions, peppers, and tomato sauce, then let it simmer. No fancy techniques, no last-minute scrambling. Honestly, I’ve made this while scrolling through my phone.
- Deep, Rich Layers: The slow-simmered beef turns tender enough to melt, while the garlic and peppers caramelize into something almost fancy. That canned tomato sauce? It’s the secret—sweet, tangy, and thick enough to coat every bite. Between us, it’s the kind of flavor that makes you pause mid-spoonful.
- Weeknight to Potluck: Same recipe, endless uses: dump it over rice for a hearty bowl, serve it in bread bowls for guests, or freeze half for when you’re too tired to cook. I’ll be real—my college dorm mates still ask for this, and now my in-laws too.
Step-by-step instructions for beef picadillo soup
Here's how to make this hearty stew with perfectly tender meat and aromatic spices.
Sear the Beef for Maximum Flavor
Heat a large Dutch oven over medium-high heat and add the 2 lb Beef Chuck Roast cut into 1-inch cubes. Don't crowd the pan—work in batches if needed. Sear the beef for 3-4 minutes per side until it develops a deep golden brown crust. This step builds rich flavor that infuses the entire soup.
As you sear, you'll notice the meat releases juices and fat into the pan. This is normal and actually enhances the sauce later. Once all the beef is browned, remove it from the pot and set aside. We'll return it to the pot after building the flavor base.
Build the Aromatic Base
In the same Dutch oven, add 2 tablespoons olive oil (not listed in ingredients but essential for this step) and reduce heat to medium. Add the 2 whole Yellow Onions sliced into strips and cook for 5 minutes until softened. Then add the 2 whole Green Bell Peppers sliced and cook for another 4 minutes until they begin to soften.
Stir in the 6 cloves Garlic Cloves (minced) and cook for 30 seconds until fragrant. This is where the foundation of your soup's flavor develops. You should smell those sweet onion and pepper aromas mixing with the garlic's sharpness. Don't let the garlic burn—watch it closely as it cooks quickly.
Add Spices and Tomato Sauce
Sprinkle in the 1 tablespoon Ground Cumin, 1 tablespoon Ground Coriander, 1.5 teaspoons Salt, and 0.5 teaspoon Black Peppercorns. Stir everything together for 30 seconds to toast the spices slightly—this releases their essential oils and deepens their flavor.
Pour in the 2 cups Canned Tomato Sauce and scrape up any browned bits from the bottom of the pot with a wooden spoon. These bits are packed with flavor. Add the 4 cups Chicken Broth and bring the mixture to a gentle boil. Return the seared beef to the pot and stir to combine.
Simmer Until Meat is Tender
Add the 2 whole Bay Leaves and bring the soup to a gentle simmer. Partially cover the pot and let it cook for 1 hour 15 minutes or until the beef is fork-tender. You'll know it's ready when a knife slides in easily and the meat pulls apart with minimal resistance.
During this time, stir occasionally to prevent the broth from sticking to the bottom. If the soup reduces too much and becomes too thick, add ½ cup water to maintain the proper consistency. The flavors will meld beautifully as they simmer together.
Finish with Rice and Garnish
About 20 minutes before the soup is done, add the 1 cup Long-Grain White Rice to the pot. Stir gently to distribute the rice evenly throughout the broth. The rice will absorb the flavorful liquid and become perfectly tender.
When the beef is tender and the rice is cooked (about 20-25 minutes after adding it), remove the 2 whole Bay Leaves. Stir in the 0.5 cup Green Olives and 2 tablespoons Capers. Taste and adjust seasoning if needed—you might want to add a pinch more salt or pepper to balance the flavors.
Ladle the soup into bowls and garnish each serving with 0.25 cup Fresh Cilantro chopped. The bright green color and fresh flavor contrast beautifully with the rich, spiced beef and tomato base. Serve immediately with warm crusty bread to soak up every last drop of this flavorful stew.
Pro Tips For Making Beef Picadillo Soup
- Sear the Chuck First: Don’t skip browning that roast—cut it into 1.5-inch chunks first, then sear in batches over medium-high heat with 1 tablespoon of oil. I learned this the hard way: rushing the sear means flavor gets lost in the sauce later. Let the meat develop a crust before touching it with anything else.
- Char the Onions Low: After dicing the onions, cook them on low heat for 10-12 minutes until they’re deep golden and slightly caramelized. Too much heat turns them bitter, and that’s when your soup starts tasting like sad office cafeteria food. Patience here makes a real difference.
- Blot the Bell Peppers Dry: Pat those green bell peppers with a paper towel before slicing—they’ll brown faster and won’t steam into mush. I was skeptical until I tried it: crisp edges on the peppers cut through the richness of the beef and tomato sauce every time.
- Deglaze with Tomato Sauce: After searing the meat and onions, splash in 1/2 cup of the canned tomato sauce to scrape up the browned bits. It’s the thing that matters most for depth—those bits are pure flavor, and skipping the deglaze means missing out. Save the rest for later.
Pro cooking tips for great beef picadillo soup
Sear Like a Pro
Don’t skip the searing step—this is where 90% of the flavor develops. Use a heavy Dutch oven (like Lodge) and work in batches if needed to avoid crowding. The beef should sizzle loudly and develop a deep mahogany crust—this creates the Maillard reaction that builds rich, caramelized depth. I like to pat the beef dry with paper towels first for better browning. 🔥
Spice Toasting Trick
Toast your cumin and coriander for 30 seconds before adding liquids—this releases their essential oils and makes the flavors 3x more potent. Use a dry skillet over medium heat and stir constantly to prevent burning. The spices should smell warm and aromatic, not bitter. This small step transforms good soup into restaurant-quality depth.
Simmer Control
Keep your soup at a gentle simmer (small bubbles, not a rolling boil) to prevent the rice from turning mushy. If it gets too thick, add ½ cup water gradually. I use a meat thermometer to check the beef—it should reach 203°F for perfect tenderness. The longer it simmers, the more the flavors meld, but never exceed 2 hours or the beef will dry out.
Rice Timing Hack
Add rice 20 minutes before serving to let it absorb all the flavorful broth. If you’re short on time, use pre-cooked rice (like Trader Joe’s microwavable packs) and stir it in during the last 10 minutes of cooking. The key is stirring gently so the rice doesn’t clump—just break up any lumps with a wooden spoon.
Olive and Caper Balance
Taste your soup before adding olives and capers—these can make it too briny if overdone. I recommend ½ cup olives and 2 tbsp capers for 6 servings, but adjust to taste. If it’s too salty, add a splash of chicken broth to dilute. The olives should be pitted and sliced for even distribution, and the capers should be rinsed if they’re very briny.
Garnish for Freshness
Fresh cilantro brightens the dish, but don’t add it to the pot—it wilts in the heat. Instead, chop it just before serving and sprinkle on top. For extra flair, add a drizzle of olive oil and a pinch of red pepper flakes to each bowl. The contrast of fresh herbs against the rich, spiced beef makes every bite feel restaurant-perfect. ✨
Nutrition facts
Frequently asked questions
Can I substitute chicken or pork for the beef?
The traditional recipe calls for beef because of its rich, deep flavor that stands up to the long simmering time. Chicken would cook too quickly and become dry, while pork might not develop the same tender texture. If you must substitute, try pork shoulder cut into large chunks and increase simmering time by 30 minutes to ensure tenderness.
How do I prevent the rice from getting mushy?
Add the rice 20 minutes before serving and stir it gently into the broth. Avoid lifting the lid too often, which releases steam and can make the rice gummy. For extra insurance, use jasmine rice (it holds up better) or reduce the cooking time by 5 minutes and finish under the broiler for 2 minutes to crisp the tops.
Can I make this soup in a slow cooker?
Brown the beef first in a skillet, then transfer everything to a 6-quart slow cooker. Cook on low for 6-7 hours or high for 3-4 hours. Add the rice during the last 30 minutes of cooking. The slow cooker’s gentle heat ensures the beef stays tender without drying out, and the flavors meld beautifully.
What if my soup tastes too salty?
If the soup is too briny, add ½ cup warm water or chicken broth and stir well. The extra liquid will dilute the saltiness while keeping the flavors balanced. Alternatively, stir in 1-2 tablespoons tomato paste to add depth without increasing salt. Taste as you go—small adjustments make all the difference!
How long will leftovers keep?
This soup tastes even better the next day! Store it in an airtight container in the fridge for 3-4 days. For longer storage, freeze portions for up to 3 months. Reheat gently on the stove with a splash of broth to restore moisture. The flavors deepen over time, making it perfect for meal prep.