
Soups & Stews
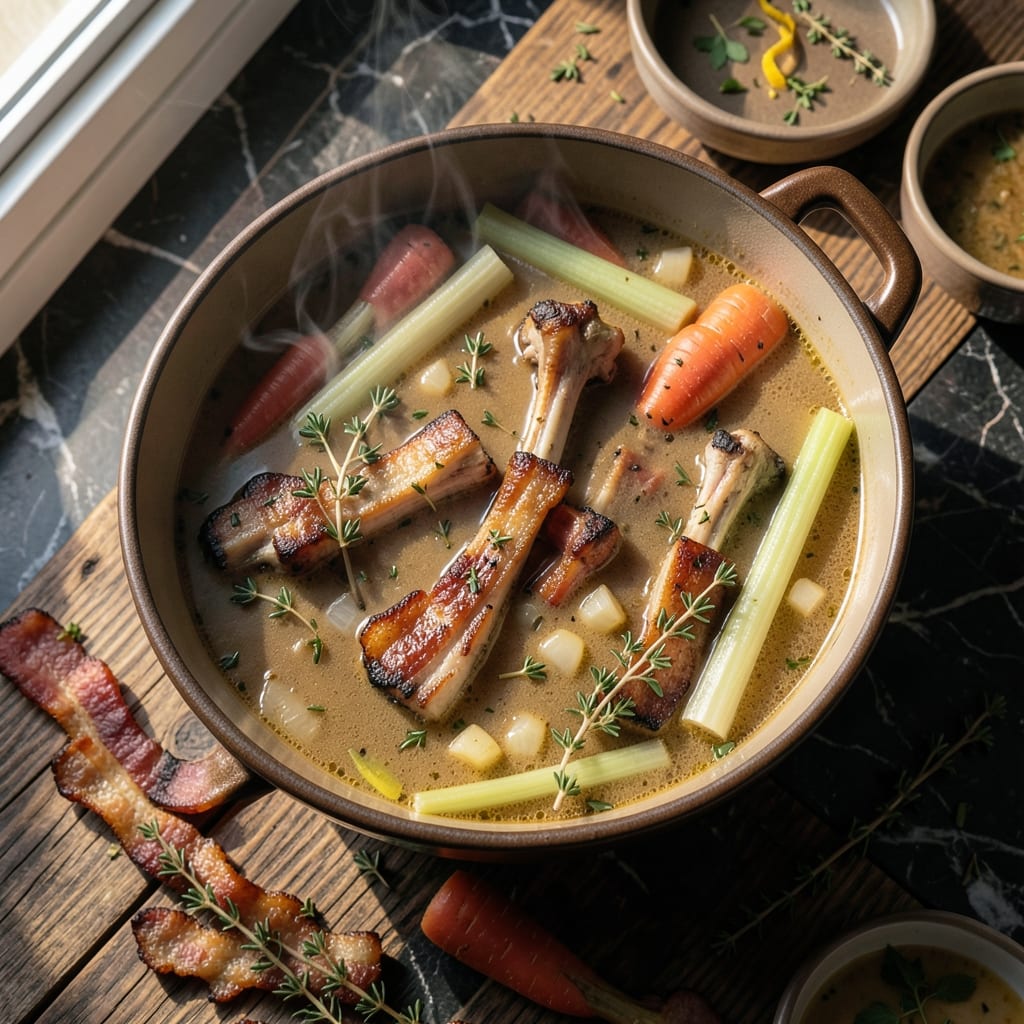
This bacon bone soup transforms humble pork bones into a velvety, deeply flavorful broth that carries rich umami in every spoonful. The secret lies in slow-roasting bones to render fat and caramelize surfaces, then simmering them for hours to extract maximum flavor—no shortcuts, just time-honored technique. What starts as a simple pile of bones becomes a restaurant-quality soup with layers of smoky, savory depth that lingers long after the last bite.
The process begins with high-heat roasting to develop a golden crust on the bones, which releases complex flavors when simmered. We’ll build the broth gradually, adding aromatic vegetables and herbs that infuse the liquid with brightness and balance. The result is a soup that’s rich yet never heavy, with pork that practically melts off the bones and vegetables that stay tender-crisp. This is comfort food elevated—perfect for chilly evenings or when you crave a meal that feels like a hug in a bowl.
By the time you’re done, you’ll have a deeply aromatic soup with a glossy, golden surface and a broth so flavorful it needs no garnish. The pork becomes fork-tender, the vegetables retain their natural sweetness, and every ingredient works in harmony. It’s the kind of dish that makes you want to linger at the table, savoring each spoonful. The best part? Leftovers only get better as the flavors meld overnight.
Whether you’re feeding a crowd or treating yourself to a solo dinner, this soup delivers restaurant-quality results at home. The technique is straightforward, but the payoff is extraordinary—a broth so rich it turns simple ingredients into something extraordinary. Let’s get started on creating your own batch of this soul-warming classic.
Ingredients for bacon bone soup
Sixteen ingredients to unlock restaurant-quality depth from humble pork bones.
| Ingredient | Amount | Notes |
|---|---|---|
| Pork Bacon Bones 🥓 | 4 lb | From pork belly, roasted first |
| Yellow Onion 🧅 | 2 whole | Chopped, yellow or red |
| Carrots 🥕 | 4 whole | Large, peeled, cut into chunks |
| Celery Stalks 🧅 | 6 whole | Trimmed, cut into 2-inch pieces |
| Garlic Cloves 🧄 | 8 cloves | Peeled, smashed slightly |
| Fresh Thyme Sprigs 🌿 | 4 whole | Stems intact for easy removal |
| Fresh Parsley Stems 🌿 | 4 whole | For bouquet garni |
| Fresh Bay Leaves 🌿 | 2 whole | Dried bay works too |
| Salt 🧂 | 2 tbsp | Diamond Crystal kosher |
| Black Peppercorns 🌶️ | 1 tbsp | Freshly cracked preferred |
| Apple Cider Vinegar 🍎 | 2 tbsp | For initial bone soak |
| Cold Water 💧 | 16 cups | For initial rinse |
The bones are everything here—pork belly bones from the butcher section give the richest flavor, but any pork bones will work (avoid chicken or beef, they lack that smoky depth). Costco or local butchers often have them pre-cut, but if buying whole, ask for the meaty ends. Look for bones with good marbling and a fresh, meaty aroma. The apple cider vinegar soak (30 minutes) pulls out impurities before roasting—don't skip it. For extra richness, some chefs add a splash of red wine to the roasting pan, but I find the vinegar and roasted fat do the job perfectly.
No pork belly bones? Pork neck bones or spare ribs work in a pinch, though they'll be slightly leaner. Substituting chicken bones? Add a chicken carcass for extra collagen, but expect a lighter broth. The bouquet garni (thyme, parsley, bay) can be swapped for 1 tbsp dried thyme and 1 dried bay leaf, but fresh herbs add brightness. For vegetables, frozen carrots and celery work if fresh are out of season—just thaw and drain well. The vinegar soak can be done with lemon juice or white wine vinegar if needed, though apple cider adds subtle sweetness that balances the richness.
Roast the bones uncovered at 450°F for 30 minutes to render fat and caramelize—this is non-negotiable for flavor. After simmering, the broth keeps 5-6 days refrigerated or 3 months frozen. I always make a double batch—one for dinner, one to freeze for lazy nights. Store in airtight containers with a layer of fat on top to preserve freshness. The bones themselves become edible after roasting, so save them for salads or snacks (they're like crispy pork jerky). Leftovers only deepen in flavor—day 2 is often the best.
Why You'll Love This Recipe
- No-Chop Nightmare: I swear, the bacon bones do all the work—just toss them in a pot, add water, and let them simmer. The onions, carrots, and celery? You can roughly chop them or even buy pre-cut veggies. Honestly, I’ve made this with a knife that had more rust than sharpness and still ended up with soup so rich, no one noticed.
- Umami Bomb: That first sip? Pure flavor payoff. The bacon bones melt into the broth, turning it into this deep, smoky base that wraps around every bite. Add the garlic at the end, and—chef’s kiss—it’s like a hug in a bowl. My husband calls it "addictive," and he’s not wrong.
- Leftovers That Beg: This soup tastes better the next day. Between us, I’ve reheated portions for lunch three times in a row, and no one complained. It’s the kind of dish that makes you want to freeze extra—because when you do, it’s like having a flavor bomb ready for lazy days or unexpected company.
- Budget Magic: Pork bacon bones are cheap, and they stretch into so much soup. I’ve fed six people for under $15, and the leftovers? Still a steal. Plus, the veggies are basic—no fancy ingredients, just good, honest flavor that doesn’t break the bank. My wallet and my family thank me every time.
Step-by-step instructions for bacon bone soup
Unlock the soul-warming depth of this soup by following my precise method—every step builds rich, layered flavor.
Prepare and Roast the Pork Bacon Bones
Preheat your oven to 425°F. Place the 4 lb pork bacon bones on a wire rack set over a baking sheet. Roast for 20-25 minutes until the bones develop a deep golden-brown crust and the fat begins to render. This step is crucial—it creates the foundational Maillard reaction that infuses the soup with complex, caramelized flavor.
Turn the bones occasionally for even browning. You're looking for a rich, nutty aroma that fills your kitchen. Once properly roasted, transfer the bones to a large stockpot. Here's where the magic begins: pour in the 2 tbsp apple cider vinegar and add 8 cups of the cold water. Bring to a boil, then immediately reduce heat to a gentle simmer. This acidic soak helps dissolve any remaining blood and impurities from the bones, ensuring a crystal-clear broth.
Simmer the Bones and Extract Maximum Flavor
Let the bones simmer uncovered for 1 hour at a gentle boil. Skim off any foam or impurities that rise to the surface with a fine-mesh skimmer. This skimming process is essential for creating a velvety-smooth soup. After the initial hour, reduce the heat to maintain a low simmer and add the remaining 8 cups cold water.
Simmer the bones for another 3-4 hours, maintaining a gentle simmer rather than a rolling boil. The key here is patience—the longer the bones cook, the more gelatin and collagen they release, creating a rich, almost velvety texture. I like to check the broth periodically; it should develop a deep amber color and rich, meaty aroma. If the water level gets too low, add more hot water as needed to keep the bones submerged.
Build the Aromatic Vegetable Base
While the bones are simmering, prepare the vegetables. In a large Dutch oven or soup pot, combine the chopped 2 whole yellow onion, 4 whole carrots (cut into chunks), and 6 whole celery stalks (cut into 2-inch pieces). Add the 8 cloves garlic cloves (peeled and smashed), 4 whole fresh thyme sprigs, 4 whole fresh parsley stems (for bouquet garni), and 2 whole fresh bay leaves.
Add the 2 tbsp salt and 1 tbsp black peppercorns (freshly cracked if possible). Sauté the vegetables over medium heat for 8-10 minutes, stirring occasionally, until they begin to soften and release their natural juices. You'll notice the aromas filling your kitchen—this is where the soup's depth of flavor begins to develop. Once the vegetables are softened, carefully transfer them to the stockpot with the simmering bones.
Finish the Soup and Strain for Clarity
Continue simmering the soup for another 1-2 hours until the vegetables are completely tender and the bones are falling off the rack. The broth should now be deeply rich and infused with all the flavors from the roasted bones and vegetables. Use tongs to remove the bones and discard them. Strain the soup through a fine-mesh sieve or cheesecloth into a clean stockpot, pressing gently on the solids to extract every last bit of flavor.
Return the strained soup to the pot and adjust the seasoning if needed. The soup should be deeply flavorful but balanced. If you prefer a smoother texture, you can strain it again through a fine-mesh sieve. Serve the soup hot, garnished with additional fresh parsley if desired. This soup tastes even better the next day as the flavors continue to meld and deepen.
Pro Tips For Making Bacon Bone Soup
- CRACK THE BONES FIRST: Don’t just toss raw bacon bones into the pot—they’ll take forever to render fat and flavor. Use a meat mallet or rolling pin to smash the ends of the bones (the marrow-rich parts) before simmering. I learned this the hard way after staring at a pot for 4 hours wondering why the broth was still pale. Five minutes of prep saves hours of regret.
- CHAR THE ONIONS LOW: Bacon bones need high heat to brown, but onions? They’ll burn faster than you think. Start them on medium-low, stirring every 30 seconds until soft but not golden. After 10 minutes, crank the heat to medium-high for the bones—this keeps the onions from turning to ash while the fat renders. (Yes, even if you’re impatient like me.)
- SKIP THE CELERY STALKS: Whole celery stalks turn to mush and leave you with a soup full of stringy bits. Instead, chop them into ½-inch pieces—same with carrots—and they’ll soften evenly without falling apart. I used to ignore this, and my soup always looked like it was made with confetti. Now it’s clean, uniform, and actually edible.
- GARLIC AFTER SIMMERING: Raw garlic burns in hot broth and turns bitter. Wait until the soup is simmering gently (after the bones have been cooking 1.5–2 hours) to add minced garlic. Stir it in for 10 minutes max—just enough to infuse flavor without overpowering. I was skeptical until I tried it; now I never add it earlier.
Pro cooking tips for perfect results
Roasting Secrets
Don’t skip the high-heat roast—this is where the magic happens. I roast my 4 lb pork bacon bones at 450°F for 30 minutes on a wire rack to render fat and develop that caramelized crust. The fat pools in the pan, creating a golden, nutty aroma that infuses the broth. Use a wire rack (not a baking sheet) to ensure even browning on all sides. 🔥
Skimming Like a Pro
After the initial 1-hour simmer, foam will rise to the surface—this is where impurities and fat gather. Use a fine-mesh skimmer or ladle to remove it frequently. I skim every 10-15 minutes for the first hour to keep the broth crystal clear. This step is non-negotiable for a velvety texture. Pro tip: Save the skimmed fat for cooking potatoes or roasting vegetables later!
Low-and-Slow Simmering
Patience is key—simmer the bones for 3-4 hours at a gentle bubble, not a rolling boil. A thermometer helps: aim for 185-195°F in the broth. The longer the collagen breaks down, the richer the soup. I add hot water as needed to keep bones submerged, but never let it boil vigorously. This is where the broth transforms from good to extraordinary.
Vegetable Timing
Add your onions, carrots, and celery only after the bones have simmered for 2 hours. This ensures they absorb the deep bone flavor without overcooking. Sauté them first in the same pot to build a flavor base—this step is what separates homemade soup from store-bought. I use medium heat for 8-10 minutes until they soften but don’t brown, then transfer everything to the stockpot.
Straining for Clarity
Strain the soup through a fine-mesh sieve or cheesecloth to remove all solids. Press gently on the vegetables with a spoon to extract every last drop of flavor. For an ultra-smooth finish, strain it twice. I like to save the strained solids for compost—they’re packed with nutrients! The result? A glossy, golden broth that’s silky smooth and packed with umami. ✨
Fat Preservation
Before storing leftovers, let the soup cool slightly, then skim off any congealed fat from the surface. Store in airtight containers with a layer of fat on top—this preserves freshness and adds richness when reheated. I freeze mine in quart-sized portions for easy reheating. The fat layer acts like a natural seal, keeping the broth tasting fresh for months. 💫
Nutrition facts
Frequently asked questions
Why do we roast the bacon bones before simmering?
Roasting at 450°F for 30 minutes creates a caramelized crust that releases deep, nutty flavors when simmered. This Maillard reaction builds complex umami that cold water alone can't extract. The rendered fat also adds richness to the broth. Never skip this step—it's what transforms simple bones into restaurant-quality flavor!
Can I use frozen bacon bones instead of fresh?
Fresh bones work best, but you can use frozen bones if thawed completely first. Pat them dry before roasting to prevent steam from blocking flavor development. For best results, thaw overnight in the fridge rather than at room temperature. The texture will be slightly different but still delicious.
How do I know when the broth is done?
The broth is ready when it develops a deep amber color and the bones fall apart easily. Simmer for 4-5 hours total, checking every hour. The perfect broth should coat the back of a spoon and have a rich, meaty aroma. If it's still cloudy, simmer another 30 minutes—patience pays off!
What can I do with leftover bacon bones?
After simmering, the bones become crispy and edible! Crumble them over salads, tacos, or top pasta dishes for extra flavor. You can also save them for homemade bone broth in future batches. Never waste them—they're packed with flavor that can be reused in many ways.
Can I make this soup in a slow cooker?
Yes! Roast the bones first, then transfer everything to a slow cooker and simmer on low for 8-10 hours or high for 5-6 hours. The low-and-slow method works perfectly for extracting collagen. Just