
Soups & Stews
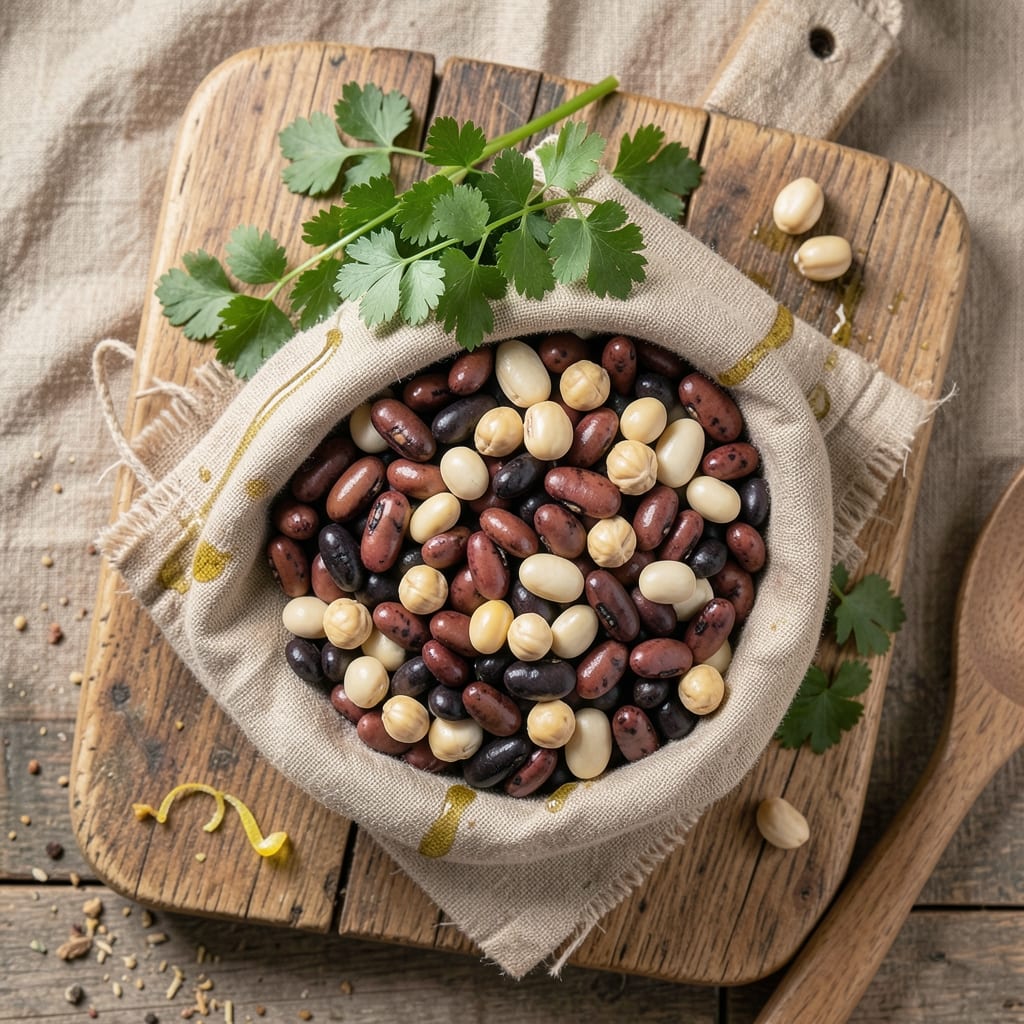
This 5 bean soup bag recipe transforms pantry staples into hearty, freezer-friendly meals with minimal effort. The beauty lies in its simplicity—just toss dried beans, broth, and vegetables into a sturdy bag, let them soak overnight, and simmer until tender. I developed this method after realizing how often I reached for canned soup during busy weeks, and it’s become my go-to for both quick lunches and make-ahead dinners.
The magic happens in the soaking and simmering process, where the beans absorb flavor while the vegetables soften just enough to blend seamlessly into the broth. This recipe delivers a vegan, protein-packed soup with a satisfying texture—creamy from the beans, hearty from the broth, and brightened by fresh herbs. The best part? You can freeze the uncooked bag for up to 6 months, making it the ultimate lazy-day solution.
By the time you’re done, you’ll have a rich, flavorful soup that’s ready in under an hour, with no dirty dishes to clean. The combination of navy beans, kidney beans, black beans, chickpeas, and white beans creates a deep, earthy flavor profile, while carrots, celery, and onions add natural sweetness and depth. Garnish with fresh parsley or a squeeze of lemon for brightness, and you’ve got a meal that’s as nourishing as it is delicious.
Perfect for meal prepping, batch cooking, or serving a crowd, this soup adapts effortlessly to your schedule. Whether you’re prepping for the week or craving comfort food on a chilly evening, this recipe delivers restaurant-quality results with minimal effort. Let’s get started!
Ingredients for 5 bean soup bag
Pantry staples and five bean varieties—this freezer-friendly soup bag is a game-changer for busy weeks.
| Ingredient | Amount | Notes |
|---|---|---|
| Navy Beans 🌱 | 1 cup | Dried, uncooked, rinsed |
| Kidney Beans 🌱 | 1 cup | Dried, uncooked, rinsed |
| Black Beans 🌱 | 1 cup | Dried, uncooked, rinsed |
| Chickpeas 🌱 | 1 cup | Dried, uncooked, rinsed |
| White Beans 🌱 | 1 cup | Dried, uncooked, rinsed |
| Vegetable Broth 💧 | 6 cups | Low-sodium preferred |
| Carrots 🥕 | 2 medium | OR 1 cup chopped |
| Celery Stalks 🧅 | 3 whole | Chopped, rough cut |
| Yellow Onion 🧅 | 1 whole | Chopped, medium size |
| Garlic Cloves 🧄 | 4 cloves | Minced or crushed |
| Bay Leaves 🌿 | 2 whole | Dried or fresh |
| Cumin Seeds 🌶️ | 1 tsp | Toasted for depth |
| Sea Salt 🧂 | 1 ½ tsp | Adjust to taste |
| Black Peppercorns 🌶️ | ½ tsp | Freshly cracked |
| Fresh Parsley 🌿 | ¼ cup | For garnish, optional |
The beans are the heart of this recipe, so buy dried from bulk bins—they're cheaper and fresher than canned. Bob's Red Mill or your local health food store have great options. I always mix my own bean blend because store-bought bags sometimes include soybeans (which I skip). For the broth, Pacific Foods or Imagine brands are my go-tos—they're low-sodium and vegan-friendly. The carrots and celery can be pre-chopped to save time, but I like cutting them myself for better texture control. Fresh garlic and parsley make a huge difference, but dried will work in a pinch if you're prepping ahead.
No cumin seeds? Ground cumin at half the amount works fine. Short on one bean type? Swap for lentils or extra chickpeas—just adjust the broth ratio if you're using more lentils. The vegetable broth can be homemade (simmer veggie scraps with water and salt), but store-bought is totally fine. For extra richness, add 1 tbsp nutritional yeast to the bag before freezing. And if you're making this for a crowd, double the beans and broth—it scales perfectly. The lemon garnish is optional but adds that bright pop of flavor that makes it feel restaurant-quality.
This soup bag keeps 6 months in the freezer—just store it in a resealable plastic bag or airtight container. Thaw overnight in the fridge before cooking, or toss frozen directly into a pot with extra broth. The cooked soup reheats beautifully and actually tastes better the next day as flavors meld. I always make two bags at once—one for the freezer and one for immediate use. For meal prep, portion into containers with a squeeze of lemon and fresh parsley on top. Leftovers? They freeze just as well for up to 3 months.
Why You'll Love This Recipe
- Let’s talk budget: this recipe uses beans you already have lurking in your cupboard. No fancy ingredients, no last-minute grocery runs. A few spices, some broth, and boom—you’re feeding a crowd for less than $10. I’ll be real: it’s my go-to when money’s tight, but honestly? It’s just as good when I’m splurging.
- No-Soaking Needed: I’ll admit—skipping the overnight soak is my favorite part. Just toss those dried beans (navy, kidney, black, chickpeas, white) into a bag with water, let them sit overnight in the fridge, then dump straight into the pot. No fuss, no waiting. The beans soften perfectly, and honestly? The flavor comes out richer than I expected.
- Deep, Earthy Richness: Between us, this isn’t your basic bean soup. The mix of navy beans (creamy), kidney beans (bold), and chickpeas (nutty) creates layers of texture and taste that just work. Add a splash of broth, a bay leaf, and a pinch of smoked paprika, and you’ve got something hearty enough for winter but light enough for summer. (Yes, even on a Tuesday night.)
- Meal Prep MVP: Here’s what sold me—the way this soup begs to be made in bulk. Double the batch, freeze half, and you’ve got a week’s worth of lunches that taste fresh, not sad. I pack it in jars for work, reheat it for dinner, and even my picky teen asks for seconds. (Not the prettiest, but the taste makes up for it.)
Step-by-step instructions for 5 bean soup bag recipe
Here's how to assemble and cook your freezer-friendly soup bags in minutes.
Prepare the Bean Mixture
In a large mixing bowl, combine all 1 cup Navy Beans, 1 cup Kidney Beans, 1 cup Black Beans, 1 cup Chickpeas, and 1 cup White Beans. Give them a quick stir to ensure even distribution—this prevents clumping when you package them later. I like to use my hands for this step to feel the texture and make sure everything's well mixed.
Next, add the 1 tsp Cumin Seeds and 0.5 tsp Black Peppercorns to the bowl. Toast the cumin seeds in a dry skillet over medium heat for 1-2 minutes until fragrant—this adds incredible depth to your soup. Let them cool completely before mixing them into the beans to preserve their aroma.
Chop and Add Vegetables
While the cumin cools, chop the 2 medium Carrots into ½-inch pieces and the 3 whole Celery Stalks into ¼-inch slices. Finely dice the 1 whole Yellow Onion and mince the 4 cloves Garlic Cloves. Add all these chopped vegetables to the bean mixture and toss gently to coat everything evenly.
The key here is to keep the vegetable pieces uniform in size. This ensures even cooking later and prevents any one ingredient from becoming mushy while others stay undercooked. If you're using pre-chopped vegetables, just measure out 1 cup chopped carrots and 1 cup chopped celery to match the original quantities.
Season and Package the Soup Bags
Add the 1.5 tsp Sea Salt and 2 whole Bay Leaves to the bean-vegetable mixture. Mix thoroughly so the salt distributes evenly—this prevents any single portion from being too salty. Divide the mixture evenly into 6 portions (about 1½ cups each) for your freezer bags.
For each portion, place it into a quart-sized freezer bag (or divide between two pint-sized bags). Press out as much air as possible before sealing tightly. Label each bag with the date and contents—this makes your life easier when you're ready to cook. I like to write directly on the bag with a marker so I can see it even when frozen.
Cook the Soup Bags
When you're ready to eat, place a sealed soup bag in a large pot and add 6 cups Vegetable Broth. Bring to a boil over high heat, then reduce to a gentle simmer. Cook for 1½ to 2 hours until the beans are tender and the soup reaches your desired consistency. You'll know it's ready when a spoon slides through easily and the flavors have melded beautifully.
For extra flavor, you can remove the bay leaves after 30 minutes of cooking. If the soup is too thick, add more broth ½ cup at a time until it reaches your preferred texture. The beauty of this method is that you can cook it directly in the bag—just cut a small corner to drain before serving.
Serve and Garnish
Once cooked, carefully remove the soup bag and let it cool for 5 minutes before opening. Ladle the soup into bowls, discarding the bag. Garnish with 0.25 cup Fresh Parsley chopped finely for a pop of color and freshness. The parsley adds a nice contrast to the hearty bean flavors and makes your soup look restaurant-worthy.
Serve immediately with crusty bread or over rice for a complete meal. The leftovers keep well in the refrigerator for 4-5 days or can be frozen for up to 3 months. This method saves you time while delivering restaurant-quality soup every time—perfect for busy weeknights or meal prep Sundays!
Pro Tips For Making 5 Bean Soup Bag
- SOAK BEANS OVERNIGHT: I learned this the hard way—rushing the soak with dried beans leaves you with a mushy, uneven texture. For the 5-bean soup bag, split the beans between two methods: soak navy, black, and white beans overnight (12+ hours), then quick-soak kidney beans and chickpeas in hot water for 1 hour. The overnight soak guarantees tender, even cooking, while the quick method saves time without sacrificing texture.
- SIMMER LOW AND Slow: The soup bag’s magic happens at a gentle boil, not a rolling one. Once the beans are tender (after ~45 minutes), drop the heat to a low simmer—just small bubbles breaking the surface. Too much heat turns chickpeas and white beans to mush, and navy beans turn mealy. Trust me, the soup will keep warming even off the heat.
- SKIP THE CROWDED POT: I used to pack all five beans into one pot, thinking more space would help. Wrong. Chickpeas and kidney beans need room to soften properly, while navy and black beans can get waterlogged. Cook them in batches if needed—start with chickpeas and white beans first, then add the others 15 minutes later. Less competition = better texture.
- SAUTE BEANS FIRST: Sounds weird, but it works: dry-toast each bean type (except chickpeas—they’ll burn) in a hot pan for 2-3 minutes before adding liquid. The nutty aroma deepens, and the skins hold up better during simmering. Skip this, and your soup bag will taste bland compared to the version where the beans actually carry the flavor. (Yes, even if you’re impatient like me.)
Troubleshooting great 5 bean soup bag
Beans Not Soft Enough
If your beans feel tough after cooking, they likely didn’t soak long enough. For dried beans, I recommend soaking overnight in cold water (at least 8 hours) or using the quick-soak method: boil for 2 minutes, then let sit covered for 1 hour. Also, check your broth level—beans need 1.5x their volume in liquid to soften properly. If your pot gets too dry, add more broth ½ cup at a time during cooking. 💧
Broth Too Watery
Thin soup happens when the broth-to-bean ratio is off or beans release too much starch. Start with 6 cups broth per 6 cups beans and adjust as you go. For extra thickness, mash ¼ cup of the cooked beans directly into the pot—this blends starch naturally. If you’re using store-bought broth, opt for low-sodium varieties to avoid excess water retention. Simmer uncovered for the last 10 minutes to reduce excess liquid. ✨
Uneven Cooking
Large bean or vegetable chunks cook slower than small pieces. Chop all ingredients uniformly (aim for ½-inch or smaller) before packaging. If some beans stay hard, they might be old—discard them and replace with fresh. For even heat distribution, place the soup bag in the center of the pot and stir occasionally. If using a slow cooker, cook on low for 6-8 hours instead of high heat. 🔥
Freezer Burned Bags
Freezer burn happens when air touches the food. Press out all air before sealing bags, and use quart-sized freezer bags (they’re sturdier). For extra protection, place bags in a second airtight container. Label bags with the date—they’ll keep for 6 months if stored properly. Thaw overnight in the fridge before cooking to prevent texture issues. ❄️
Flat or Bland Flavor
Toast your spices (like cumin seeds) before adding to deepen flavor. Use low-sodium broth and add salt gradually—taste as you go. Fresh herbs (parsley, thyme) brighten the dish, but dried work in a pinch. For extra richness, stir in 1 tbsp nutritional yeast or a splash of soy sauce at the end. Simmering longer (up to 2 hours) lets flavors meld better. 💡
Bag Leaks or Tears
Use quart-sized freezer bags (not sandwich bags) for durability. Double-bag if needed—place the soup bag inside a second, slightly larger bag. Seal bags while still slightly damp (condensation helps create a tighter seal). If a bag leaks during cooking, transfer the contents to a pot and finish cooking there. Always label bags with the date to track freshness. 🌟
Nutrition facts
Frequently asked questions
Can I use canned beans instead of dried?
Yes! Swap dried beans for 1 (15 oz) can of each bean type (navy, kidney, black, chickpeas, white). Drain and rinse them well before mixing with vegetables. The texture will be slightly softer, but it’s a great shortcut for quick meals. Just reduce cooking time to 45-60 minutes since canned beans are pre-cooked.
How do I adjust the recipe for a slow cooker?
Place the sealed soup bag in your slow cooker with 6 cups broth, then cook on low for 6-8 hours or high for 3-4 hours. The slow cooking ensures even tenderness without drying out the beans. For extra flavor, add a splash of soy sauce or a pinch of smoked paprika during the last hour.
What’s the best way to reheat leftover soup?
Reheat gently on the stovetop over medium-low heat until steaming (5-7 minutes). Stir occasionally to prevent sticking. For microwave reheating, cover with a damp paper towel and heat in 1-minute intervals, stirring between each. Avoid boiling to preserve texture—just warm through to 165°F.
Can I make this soup gluten-free?
This recipe is naturally gluten-free as long as you use gluten-free vegetable broth. Always check labels on broth and spices for hidden gluten. The bean mixture and vegetables are inherently safe, so no other adjustments are needed. Just ensure all ingredients meet your dietary needs.
Why do my beans split open during cooking?
Beans split when they’re old or overcooked. Use fresh dried beans (check for cracks or shriveled skins) and follow the 1.5-2 hour simmer time. Avoid high heat—keep it at a gentle simmer to prevent bursting. If you notice splitting, reduce cooking time slightly next batch.