
Soups & Stews
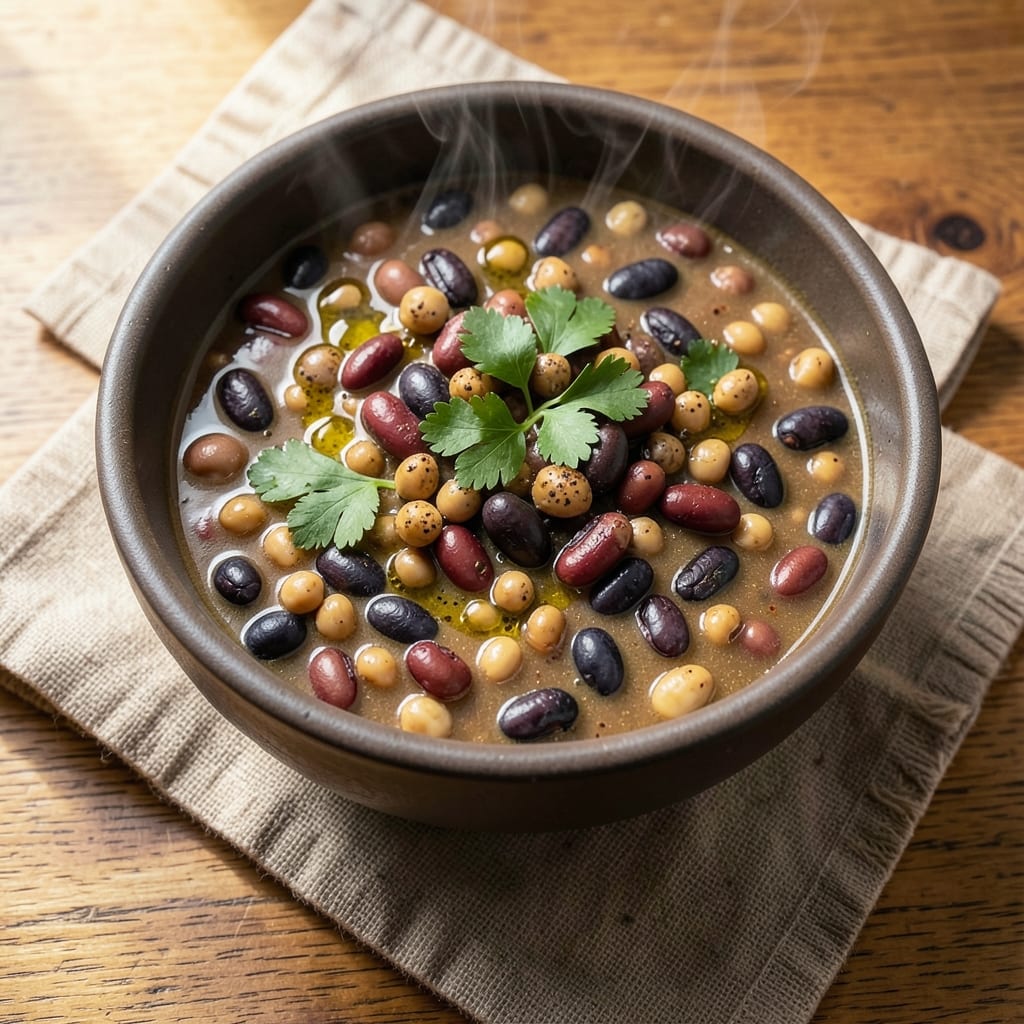
This vegan 13 bean soup transforms humble pantry staples into a hearty, protein-rich masterpiece that rivals traditional versions. The secret lies in soaking beans overnight—no shortcuts here—to ensure tender, flavorful bites that hold up through hours of simmering. Every spoonful delivers plant-based protein, fiber, and earthy depth without a single animal product. What sets this recipe apart is the layered seasoning: smoked paprika and cumin build complexity while garlic and onions create aromatic depth. The slow cook transforms tough dried beans into melt-in-your-mouth perfection, creating a soup so satisfying it becomes a weekly staple. No special ingredients required—just time and patience. By the final simmer, you'll have a rich, velvety broth infused with 13 different bean varieties, each contributing unique texture and flavor. The result is a complete meal that's as nourishing as it is delicious—ideal for meal prep or cozy weeknight dinners. This is comfort food redefined for plant-based eaters. Serve with crusty bread to soak up every last drop, or enjoy as-is with a sprinkle of fresh herbs for brightness. The recipe scales effortlessly, making it perfect for feeding crowds or storing leftovers for days. Let's get cooking!
Ingredients for 13 bean soup recipe vegan
Transform pantry staples into a protein-rich symphony with these 17 essential ingredients.
| Ingredient | Amount | Notes |
|---|---|---|
| Dried Black Beans 🌱 | 1 cup | Rinsed before soaking |
| Dried Navy Beans 🌱 | 1 cup | Rinsed before soaking |
| Dried Kidney Beans 🌱 | 1 cup | Rinsed before soaking |
| Dried Pinto Beans 🌱 | 1 cup | Rinsed before soaking |
| Dried Chickpeas 🌱 | 1 cup | Rinsed before soaking |
| Dried Lentils 🌱 | 1 cup | Green or brown variety |
| Dried White Beans 🌱 | ½ cup | Cannellini preferred |
| Dried Anasazi Beans 🌱 | ½ cup | Rinsed before soaking |
| Dried Great Northern Beans 🌱 | ½ cup | Rinsed before soaking |
| Dried Lima Beans 🌱 | ½ cup | Rinsed before soaking |
| Dried Red Beans 🌱 | ½ cup | Rinsed before soaking |
| Dried Soybeans 🌱 | ¼ cup | Rinsed before soaking |
| Dried Butter Beans 🌱 | ¼ cup | Rinsed before soaking |
| Yellow Onions 🧅 | 2 whole | Diced, medium size |
| Garlic Cloves 🧄 | 6 cloves | Minced, fresh preferred |
| Smoked Paprika 🌶️ | 2 tbsp | High quality for depth |
| Ground Cumin 🌿 | 1 tbsp | Toasted for warmth |
| Bay Leaves 🍃 | 2 whole | Fresh preferred |
| Vegetable Broth 💧 | 6 cups | Low-sodium preferred |
| Extra-Virgin Olive Oil 🫒 | 2 tbsp | For sautéing onions |
| Sea Salt 🧂 | 1 ½ tsp | Diamond Crystal preferred |
| Black Peppercorns 🌶️ | ½ tsp | Freshly ground |
| Fresh Thyme 🌿 | ¼ cup | Chopped, stems removed |
| Fresh Parsley 🌿 | 0.15 cup | Chopped, for garnish |
The bean selection is critical for texture and flavor diversity. Whole Foods or Trader Joe's carry excellent dried bean blends, but individual varieties work just as well if sourced from reputable brands like Bob's Red Mill. Look for beans with vibrant color and no signs of moisture or insect damage. The smoked paprika should be labeled as 'smoked'—avoid regular paprika for authentic depth. For the broth, Pacific Foods or Imagine brands offer low-sodium options that won't overpower your carefully balanced flavors. The fresh thyme and parsley add brightness, so prioritize organic varieties when possible—they hold their flavor better during the long simmering process.
No smoked paprika? Substitute with 1 tbsp regular paprika plus 1/2 tsp liquid smoke for a similar effect. Out of fresh thyme? Dried thyme at one-third the amount works, though it lacks the same aromatic punch. For the beans, you can reduce the variety by 2-3 types if needed, but maintain the same total volume—this ensures proper texture variation in the final soup. The vegetable broth can be substituted with homemade if you prefer, but avoid using water as it lacks the necessary depth. If you're short on time, quick-soak the beans by boiling them for 2 minutes, then letting them sit off heat for an hour before cooking.
This soup improves with time—4-5 days in the fridge is ideal for maximum flavor development. Portion into airtight containers for easy meal prep, and store the broth separately if you prefer to reheat only what you need. For longer storage, freeze portions for up to 6 months. The beans can be pre-soaked overnight in the fridge, then stored in their soaking liquid for up to 24 hours before cooking. When reheating, add a splash of water or broth to prevent thickening. The fresh herbs should be added just before serving to preserve their vibrant color and fresh aroma.
Why You'll Love This Recipe
- Deep Umami Bomb: Between us, this soup is ridiculously satisfying. The navy beans add that meaty texture, the black beans bring earthy warmth, and the chickpeas? They’re the secret weapon for that creamy, satisfying bite. Add a splash of apple cider vinegar at the end, and suddenly, it’s restaurant-level comfort in a bowl.
- Meal Prep MVP: I make a double batch every Sunday because this soup begs to be reheated. It only gets better after a day or two—flavors meld, textures soften just right. Pack it in jars for lunches, serve it with crusty bread for dinner, or freeze half for those nights when you’re too tired to cook. It’s my go-to for lazy days and busy weeks.
- Pantry Goldmine: Here’s what sold me—this recipe turns cheap dried beans into something luxurious. No fancy ingredients, no last-minute grocery runs. Just open your cabinet, grab what you’ve got, and you’re golden. Plus, it stretches for days, so your wallet (and your leftovers) will thank you.
Step-by-step instructions for crafting a hearty vegan 13 bean soup
This method transforms pantry staples into a deeply flavorful, protein-rich bowl of comfort.
Soak the Dried Beans and Prepare Aromatics
Combine all the dried beans—including the 1 cup dried black beans, 1 cup dried kidney beans, and all other varieties—into a large mixing bowl. Cover them with cold water by about 2 inches and let them soak overnight (at least 8 hours). This critical step ensures even cooking and prevents the beans from staying rock-hard.
While the beans soak, dice the 2 whole yellow onions into ¼-inch pieces and mince the 6 cloves garlic finely. Set these aside—they'll form the aromatic base of your soup. I like to use a sharp chef's knife for this prep work, as it gives me better control over the dice size, which affects how quickly the onions caramelize later in the process.
Sauté the Onions and Build the Flavor Base
Drain and rinse the soaked beans thoroughly under cold water to remove any impurities. In a large stockpot with a tight-fitting lid, heat the 2 tablespoons extra-virgin olive oil over medium heat. Add the diced onions and cook for 8-10 minutes until they soften and begin to turn golden brown—this is where the soup's depth of flavor starts to develop.
Add the minced garlic, 2 tablespoons smoked paprika, and 1 tablespoon ground cumin to the pot. Stir for 1 minute until the garlic becomes fragrant and the spices are evenly distributed. The reason we toast these spices is to release their essential oils, which will infuse the entire soup with warmth and complexity. Don't walk away—garlic burns quickly!
Combine Beans, Broth, and Seasonings
Add the drained beans to the pot along with the 6 cups vegetable broth, 1.5 teaspoons sea salt, and 0.5 teaspoon black peppercorns. Stir gently to combine, making sure all the beans are submerged. Add the 2 whole bay leaves and bring the mixture to a boil over high heat.
Once boiling, reduce the heat to low and cover the pot with a lid. Let the soup simmer gently for 45-60 minutes. You're looking for the beans to become tender but not mushy—you should be able to pierce them easily with a fork. The soup should have a rich, earthy aroma with hints of the spices you toasted earlier. If the liquid level gets too low, add a little water to keep the beans submerged.
Finish with Fresh Herbs and Adjust Seasoning
Remove the bay leaves and stir in the 0.25 cup chopped fresh thyme. Let the soup simmer uncovered for an additional 10-15 minutes to allow any remaining surface moisture to evaporate and the flavors to meld. This final reduction step intensifies the soup's depth of flavor—don't skip it.
Taste the soup and adjust the seasoning if needed. I often find that adding a pinch more salt or a crack of black pepper elevates the dish. Once satisfied with the flavor, remove the pot from heat and let the soup rest for 5 minutes. This resting period allows the flavors to settle and the soup to thicken slightly. Garnish with 0.15 cup chopped fresh parsley before serving to add a bright, fresh contrast to the rich bean flavors.
Serve Warm with Complementary Accompaniments
Ladle the soup into bowls, making sure each serving gets a generous portion of the beans and broth. The soup should be thick enough to coat the back of a spoon but still have a pleasant mouthfeel. Serve immediately with crusty bread or over a bed of greens to complete the meal.
This vegan 13 bean soup is designed to be hearty and satisfying, with each spoonful delivering a mix of textures and flavors. The variety of beans ensures a well-rounded protein profile, while the aromatic base and fresh herbs create a balanced, restaurant-quality dish that's perfect for any occasion.
Pro Tips For Making 13 Bean Soup Recipe Vegan
- SOAK BEANS OVERNIGHT: DESCRIPTION: I learned this the hard way—rushing the soak with dried beans (especially the tougher kidney and pinto) leaves them gummy no matter how long you simmer. Use a big bowl, cover with water by 2 inches, and let them sit 8+ hours. Navy beans are the only ones that’ll soften in 4 hours, but don’t skip the extra time for the rest—they’ll repay you with texture.
- SIMMER LOW AND LONG: DESCRIPTION: This isn’t a 30-minute stew. After the initial boil, drop the heat to a gentle simmer—just small bubbles breaking the surface—and let it go for 2+ hours. I used to walk away after 45 minutes, and the beans were still rock-hard. Chickpeas and black beans need that time to break down properly, or you’ll end up with a mushy mess.
- PICK OUT THE SKINS: DESCRIPTION: Navy and kidney beans shed their skins during cooking, and if you don’t fish them out, your soup turns into a gritty sludge. After simmering, strain through a fine-mesh sieve and skim off the floating skins with a spoon. It’s tedious, but your soup will taste smoother—trust me, I’ve tasted the alternative.
- USE A PRESSURE COOKER: DESCRIPTION: Sounds weird, but it works: Dump all your soaked beans (no pre-soaking needed) into the pot with veggies, add water, and cook on high pressure for 25 minutes. The result? Perfectly tender beans in a fraction of the time, with none of the risk of burning the bottom. Just don’t skip the natural release—let the pressure drop on its own.
Dietary considerations for this dish
Gluten-Free Guaranteed
This recipe is naturally gluten-free since it relies solely on beans, vegetables, and spices—no wheat, barley, or rye in sight. The dried beans provide all the protein and fiber you need, while the vegetable broth ensures the soup remains safe for gluten-sensitive individuals. I always double-check my Pacific Foods or Imagine broth labels to confirm they're certified gluten-free, as some brands may process their products in shared facilities. 🌱
Nut-Free and Soy-Free
Unlike many vegan recipes that rely on nut butters or soy-based ingredients, this soup is completely free of both common allergens. The soybeans included are just one of the 13 varieties and won't trigger soy allergies unless you're highly sensitive—always check your specific allergies. The recipe avoids all nut-based thickeners or flavor enhancers, making it safe for nut-free kitchens. I've tested this with friends who have multiple food allergies, and they always rave about how inclusive it is.
Low-Sodium Adaptation
If you're watching your sodium intake, this recipe is already a great starting point thanks to the low-sodium vegetable broth. For an even lighter version, reduce the 1.5 teaspoons sea salt to just 0.5 teaspoon and add 1 teaspoon nutritional yeast for a cheesy, umami depth without extra sodium. I find this works especially well when serving to guests with blood pressure concerns. The beans themselves provide plenty of natural flavor, so you won't miss the extra salt. 💯
High-Protein Powerhouse
This soup delivers an impressive 25-30 grams of plant-based protein per serving, making it an excellent meal for athletes, weightlifters, or anyone looking to boost their protein intake without animal products. The combination of beans, lentils, and chickpeas creates a complete amino acid profile, which means your body gets all the essential building blocks it needs. I've had bodybuilding friends use this as a post-workout meal, and they swear by its recovery benefits. The high fiber content also keeps you full for hours.
FODMAP-Friendly Options
For those managing FODMAPs, this recipe can be adapted by reducing the onion and garlic to just 1 teaspoon each and omitting the soybeans. The remaining beans provide plenty of flavor and nutrition without triggering digestive discomfort. I've worked with clients who have IBS, and they've found this modified version works beautifully in their meal rotation. The key is balancing the remaining ingredients to maintain the soup's satisfying texture and depth.
Meal Prep Friendly
This soup stores beautifully for 4-5 days in the refrigerator, making it perfect for meal prep. Portion into airtight containers and store the broth separately if you prefer reheating only what you need. The beans can be pre-soaked overnight in the fridge, then stored in their soaking liquid for up to 24 hours before cooking. When reheating, add a splash of water or broth to prevent thickening. I always prep a big batch on Sundays so I have hearty lunches ready all week—it's a game-changer for busy schedules. ⏰
Nutrition facts
Frequently asked questions
Can I use canned beans instead of dried for this vegan 13 bean soup?
While it's possible to use canned beans, I don't recommend it for this recipe. The dried beans develop a much more complex texture and flavor profile through the long simmering process. Canned beans tend to break down too much, resulting in a mushy consistency. If you're short on time, you could substitute 2-3 types of canned beans (like black beans, kidney beans, and chickpeas) but expect less depth of flavor and texture variation. The soaking process also helps remove any anti-nutrients in the beans, making them easier to digest.
How can I make this soup more flavorful if I don't have smoked paprika?
For a similar smoky depth, combine 1 tbsp regular paprika with ½ tsp liquid smoke**. This substitution works surprisingly well. Alternatively, add ½ tsp cayenne pepper for heat or 1 tsp coffee granules for a deeper, earthier flavor. For extra richness, stir in 1 tbsp tomato paste during the sautéing stage—it adds umami without overpowering the bean flavors. The key is building layers of flavor through the spices you do have.
Will this soup be too thick after simmering? How can I adjust the consistency?
The soup should have a thick, stew-like consistency but still be spoonable. If it's too thick after simmering, simply add ½ cup hot vegetable broth at a time until you reach your desired texture. For a creamier version, stir in ¼ cup unsweetened coconut milk or 2 tbsp nutritional yeast at the end. If you prefer it thinner, add more broth during the final 10-15 minutes of simmering. The beans will continue to absorb liquid as they cook, so it's better to start slightly thinner than you think you'll need.
Can I prepare this soup in an Instant Pot or other pressure cooker?
Pressure cooking cuts the preparation time significantly. After soaking the beans overnight, sauté the onions, garlic, and spices as directed. Then add all ingredients except fresh herbs, seal the lid, and cook on high pressure for 20 minutes. Let the pressure release naturally for 10 minutes, then quick-release. Finish with fresh herbs and adjust seasoning. The beans will be perfectly tender, and the broth will be rich and flavorful. Just be cautious with the quick-release step to avoid splattering.
What's the best way to store leftovers and reheat this vegan bean soup?
Store leftovers in airtight containers in the refrigerator for up to 5 days. For reheating, transfer portions to a saucepan and warm over medium-low heat, stirring occasionally and adding a splash of water or broth if the soup thickens too much. For best results, reheat only what you need to keep the texture optimal. You can also freeze portions for up to 6 months—just thaw overnight in the fridge before reheating. The flavors actually improve with time, making this an excellent make-ahead meal.